Building My House

I have always wanted to build my own house. I am retired now, so I have the time. I found some land, designed a house that would fit the land and my needs and got started. I am doing all the work myself, so progress will be fairly slow. To read this blog from the beginning, start with the oldest archive and read posts from last to first.

Sunday, September 10, 2006

The Mini-Excavator


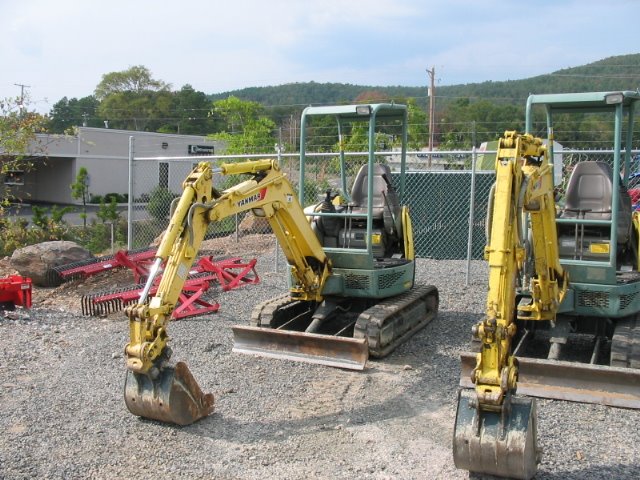
So, now that the basement slab is poured, we can get started on the last of the footers. I call up the backhoe operator who dug all the other footers and he says he can’t get to me for a month; and worse yet, he doesn’t know anyone who has a backhoe as small as his; ie one that can get into and work effectively on my narrow, tight lot. Renting something appears to be the only alternative; and he suggests trying out a “trac-hoe”. I call around town and check out backhoes and trac-hoes; they rent for about the same thing; so I go with the trac-hoe.

I have never had more fun playing in the dirt. The rental place gives you a mini-tutorial on what the controls do, but it took at least an hour of hands-on to get the basics down. Several times I’d get a bucket full of dirt picked up, and be ready to swing the boom left to dump it on my pile. Well, left hand swings the boom, but right hand dumps the bucket. You guessed it, I moved the right hand, and immediately dumped the dirt back into ditch. So, you laugh a little at your own clumsiness and then go do it again.

After the second hour you’d think I’d been operating this thing for years. I was able to use both hands at the same time; ie raise AND swing the boom at the same time, then dump the bucket while the boom was still extending.

It only took three hours to dig all my remaining footers. I’d paid for a whole day of use (8 hours of digging on the hour-meter), so I begin to think of what other trouble I could get myself into with this thing. My building site is not as smooth as I’d like; a few dips and high spots; but not anymore. The trac-hoe has a bulldozer blade which moves earth very effectively, but that earth is on the “other” side of the ditch I just dug. So, now the fun part is how to cross the ditch. I had seen my backhoe operator put the “front” bucket down on the ground and use it to lift up the front end of his tractor so his smaller front tires wouldn’t get caught in the ditch. He would then power forward with his rear tires and use the front bucket as a skid to slide on; making it into kind of a tricycle. So, I tried this with the trac-hoe and it works beautifully. I had previously discussed this with the rental place manager to make sure it was okay. You, the renter are responsible for any damage of an “unusual” nature; such as letting the trac-hoe fall over on it’s side. This thing weighs 5,000 pounds and I could have nightmares trying to figure out how to get it back upright if it fell over on my lot. There is NO room to get a real wrecker in there if you need one, so CAUTION is the name of the game today (actually, it’s the name of the game every day).

After all the lot smoothing was done I still had hours left, so I dug a small drainage ditch in front and used the dirt to fill in two holes. All together; time used; four hours; and three gallons of diesel (you have to return the unit with a full tank). I could have rented it for a half day (and saved $30).

Basement Slab - Second Half


It’s funny how when you do something the second time, it goes much faster. Such was forming up the second half of the basement concrete slab. It’s also funny how you can get ahead of yourself and maybe create a problem that you won’t realize until the concrete arrives (the absolute worst time to realize you have a problem). Long story short, I didn’t order enough concrete for the second slab pour. I ended up about a quarter yard short. And the pour was going so smoothly.

I got the concrete truck into and turned around on the site; remember it’s a small site with almost no extra room. I mean, like ten minutes after he arrived, we were ready to pour. I don’t know why, but I keep using the word “we”. Here, “we” means the concrete truck driver and me. So, we start the pour and by swinging the chute left and right I get about half the form filled up in like two minutes. Then we take the “come-along” (fancy name for a big hoe) and even out the concrete, pushing it into all the corners. I take my small hoe and make “sure” it’s evenly spread into the corners. Truck driver said take a hammer and bang on the forms lightly, that will help consolidate it into the corners even better.

We then screed off the top with a long 2x4; not too bad; went fairly smoothly. He moves the truck and we do it again; only this time I start to hear individual rocks (aggregate) bouncing around inside the truck “barrel” before we’ve finished filling up the forms. That’s a bad sound as it indicates the truck is about empty.

Houston, we have a problem.

Fortunately, it was only 85 degrees that day; that helped a lot as the concrete didn’t seem to start hardening as quickly as it had on previous pours, when the temp was 95.

So, I use the bull-float to smooth it as much as possible, while the truck driver washes out the truck (there was nothing to wash out); and then use the hand-float around the edges. I get him paid, and get the truck out of the site (it’s always easier getting him out, than getting him into the site). And then it’s off to the building supply to buy Quikcrete; twelve bags, sixty pounds each.

A friend gave me a concrete mixer. I knew the fanbelt had slipped off the pulley. So, I remove the cover, plug it in to make sure the motor works; it does. So now the fan belt goes back on and is adjusted for tension; and voila the mixer now DOESN’T work; can’t get it to run no matter what I do. Give the mixer blades a push to help get them going; no dice. So, it looks like we (there’s that “we” word again) will be mixing this stuff by hand in the wheelbarrow.

The Quikcrete instructions say add about a half gallon of water per bag of mix. Ha, if you do, you won’t be able to work the concrete at all; so maybe ¾ gallon, or maybe even a little more, and it’s wet enough to be workable. One bag at a time, for ten bags, shoveled into the forms, and finally the forms are filled up. Now comes the finishing. I no longer have the bull-float (belonged to the concrete truck), and one person can’t screed this much concrete by himself with the 2x4, so all finishing will be with a hand float only.

It works surprisingly well. The hardest part was feathering in the edge of the fresh, wet concrete, with the now beginning to dry concrete. Fortunately, the now beginning to dry mix, was firm enough that I could lay plywood pieces down on it, and kneel on it to reach far enough into the slab and smooth the edges.

So, at the end of the day, I have a completed basement slab. It isn’t going to win any awards for beauty, but is pretty flat and will function well for it’s intended purpose.

Boy, I’m glad I don’t do concrete for a living.

I’ve had a day or two now to think about how I came up short on the concrete. Long story short, I think I estimated it right, but the concrete company shorted me a little. I took readings of slab width and length every three feet. The ground was a little uneven, so I took a LOT of depth readings (about every two feet), and averaged them. My width and length readings were taken to the "outside" of the forms. All these precautions means there should have been concrete leftover, but there wasn't. The one mistake that I will admit too is I didn’t order “a little extra” like I should have. I’ve always ordered a little extra, about a quarter yard, so why didn’t I do it this time…hummm.

Solo home building; what an adventure. I hope this adventure doesn’t kill me.

Basement Slab - One Week Later

I planned to leave the slab covered for two to three days. Due to rain and a busy weekend it ended up covered for six days (pretty much what the concrete book recommended). So, off comes the visqueen cover and to my surprise it is still wet under the plastic, something I really didn’t expect since I hadn’t added any water for five days. Only one small crack had formed, and it was located in a spot where it wouldn’t be seen. I was quite happy with the results of my first slab pour. It’s not perfect by any means, but it’s plenty usable.

That same day I started removing the forms. Some were easy to remove and some were not. Excess concrete had spilled over on the outside of the forms in a few places. I didn’t notice it during the pour and after six days of curing it was quite hard. So, the excess concrete had “locked” the forms in place. I tried to pry them out, no luck. I had to get the forms out because the form boards occupy the space where the expansion material between slab and block wall will eventually go. Since I couldn’t get the form boards out, I needed a way to at least cut them off level with the footer. After considering every tool I owned I decided to take my circular saw and slice the form boards into thin slices that I could pry apart and break away from the slab. This took a lot of time as I had 16 feet of form board to slice. I know that I totally dulled a Dewalt circular saw blade, but the blade was old already, and more importantly it worked.

Oh the joys of solving problems that you create for yourself by not noticing things that you should have noticed earlier. But, then again, no one said building your own house would go smoothly… or easily.