Building My House

I have always wanted to build my own house. I am retired now, so I have the time. I found some land, designed a house that would fit the land and my needs and got started. I am doing all the work myself, so progress will be fairly slow. To read this blog from the beginning, start with the oldest archive and read posts from last to first.

Thursday, December 07, 2006

Block Wall Test Stack


After finishing the base course of the East wall, I still had a little daylight left. So, I thought I’d try a little test stack on the part of the base course that was already cured (layed a week ago). I was amazed at how easy it is to build a dry-stack wall. All these block were stacked in maybe 10-15 minutes. I had to stop on this level because now it’s time to fill the cells that have rebar in them with concrete.

When I fill the cells with concrete, at the same time I will stick in another piece of rebar and overlap the rebar by 12-14 inches. Then after the concrete cures I can continue stacking.

Some blocks look dry and some look wet. The wet ones were stacked on the inside of the pallet, the dry ones were on the outside.

This is the southeast corner of the house. This wall is now four courses high. When finished it will be nine courses high. So, this corner is about half done.

Block Walls Base Course


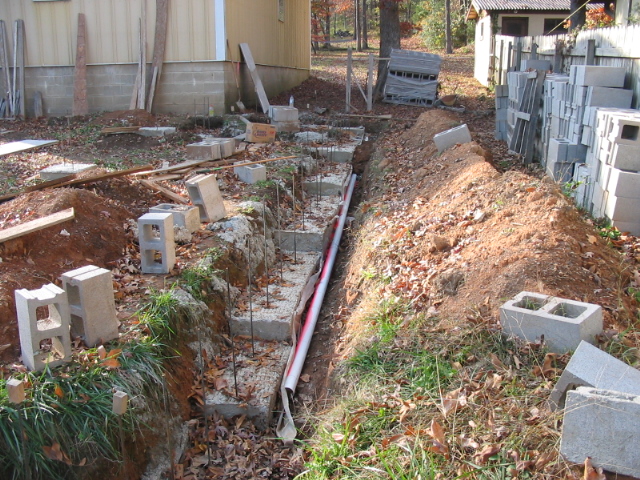
The base course is the bottom-most layer of concrete block. It sits directly on top of the footers. As the footers are not perfectly flat I will bed those blocks in a layer of mortar, but more importantly to get the elevation of the base course exactly right.

I bought 15 bags of mortar pre-mix. Thinking that it would be more than enough I mixed up half of the first 60 lb bag (in my wheelbarrow) to what I thought was about the right consistency. I had planned on the mortar layer being about 1” thick; so I put down about 2” of mortar, set the first blocks, tapped then down to the correct elevation and leveled the block. Then I noticed the blocks were sinking below my desired elevation. The mortar was too thin. So I added a little more mortar mix, stirred it up again and ended up laying about 4 blocks out of the first mix. The rest of the mixes went much better because I used less water. When the mortar is “right” it doesn’t look wet at all, not even close to the texture I see brickmasons use when laying block. But, it worked out okay and that’s what’s important.

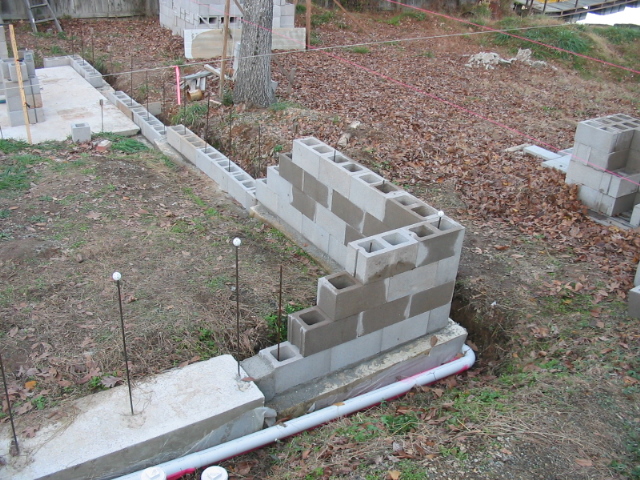
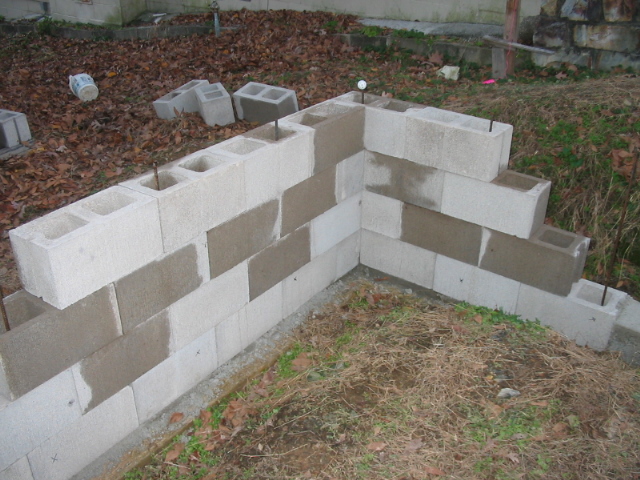
Pics 1 & 2 are what I got done the first day. I let this cure overnight and checked on it the next day; everything was fine, but a week later (after lots of rainy weather) I thought the mortar had shrunk some during curing - but, it turns out my stringline had sagged from the wet weather.

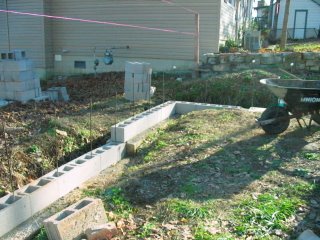
Then, a week later, the real cold weather hits, temps below freezing every night. I read in several books not lay block if it will freeze that night. So another week passes and I get an unexpected warm day. I was able to bed the rest of the East wall, so now we have 30 feet of base course down, and 120 to go.

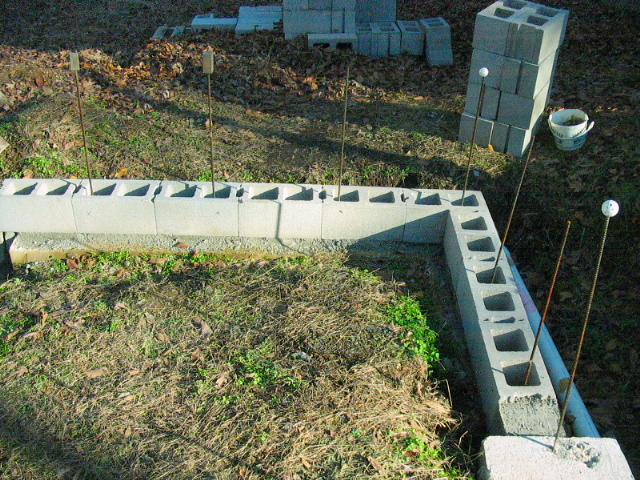
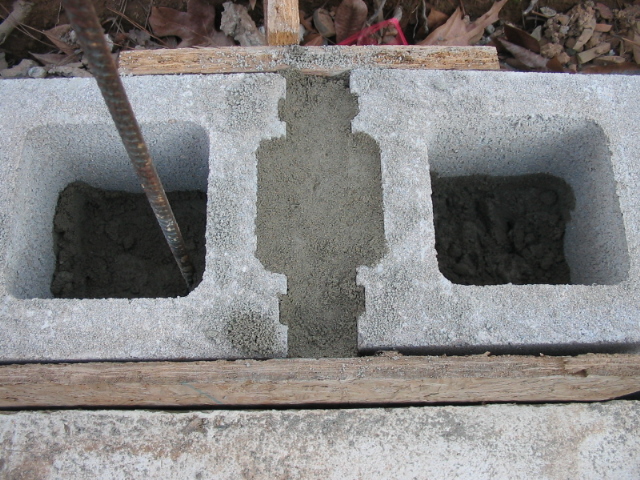
Unless your house dimensions are an even multiple of 15-5/8” (a full block length) or 7-5/8” (a half block length) you’re going to end up with extra space needing filling. Pic 3 is how I chose to fill the void. Yes, there will be one of these spaces to fill in every layer of block (on this wall).

Humm, I don’t think I’m going make my original estimate of having the block walls built by years end.

Wednesday, December 06, 2006

Last Concrete Pour & Perimeter Drain


The footers are finally finished. The last pour was 3.25 yards (3 yards actual, plus .25 yards extra just in case). This pour was different from the others because we had to wheelbarrow all the concrete into the site. How many wheelbarrow loads does it take to move three yards of concrete; I don’t know exactly, but whatever it is, it’s too many. Actually, the job went pretty smooth. My girlfriend helped me with the pour. We had two wheelbarrows in use and she moved concrete loads too until we got to a point where the tops of the footers needed finishing off. Then, she switched to doing that while I moved the rest of the concrete. I think it only took maybe an hour, or a little longer to get all the concrete in place; a lot faster than I had expected.

It was nice and cool that day, maybe 55 degrees, so I thought we could take our time putting in all the vertical rebar. Then the concrete truck driver tells me they added extra cement to the mix so it would set up faster in the cooler weather. I think 3,000 psi “footer” concrete is supposed to be about a “six-bag mix” (ie six bags of cement per yard), but he tells me (after the pour) that they used eight or nine bags of cement per yard (same cost). That about scared me to death because we still had at least 30 pieces of vertical rebar to install and I could just imagine having to use a sledge to drive it into the footers. Long story short - no problem at all. The concrete was still plenty soft to push the verticals in by hand. Another hour and the job was finished, and substantially easier than all the pours we had made during the heat of the summer.

So, now all the forms have been pulled. I bought my perforated PVC pipe for the perimeter drain system. I planned to use 4” pipe, but 3” was half the cost, so I went with that thinking there should never be enough water in this drain to need the larger pipe. In case you don’t remember previous posts about the perimeter drain, this drain system sits right beside the bottom of all the footers to capture and drain away any water that manages to slide down the footer walls or come into the area from any other source. I’m doing this because my crawlspace is being built like a basement; ie heated and cooled and I don’t want any moisture problems down there. Everything I’ve read says that a well drained project prevents moisture problems. The footers also have visqueen on the bottom and sides to help prevent moisture from wicking through the footers. Let’s hope all these extra steps have the desired result.