Building My House

I have always wanted to build my own house. I am retired now, so I have the time. I found some land, designed a house that would fit the land and my needs and got started. I am doing all the work myself, so progress will be fairly slow. To read this blog from the beginning, start with the oldest archive and read posts from last to first.

Friday, August 04, 2006

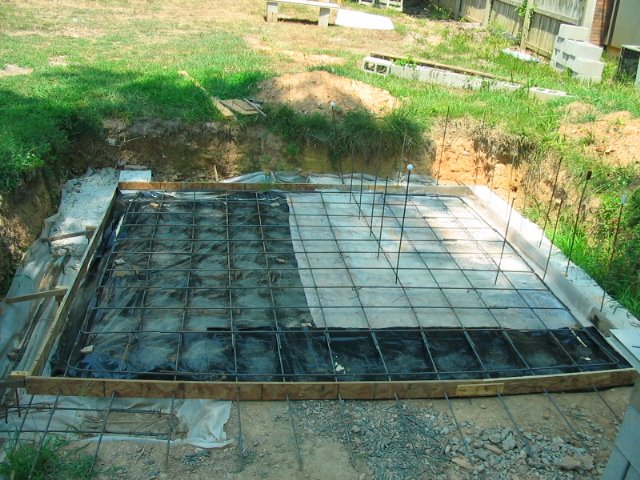
First Basement Slab Pour

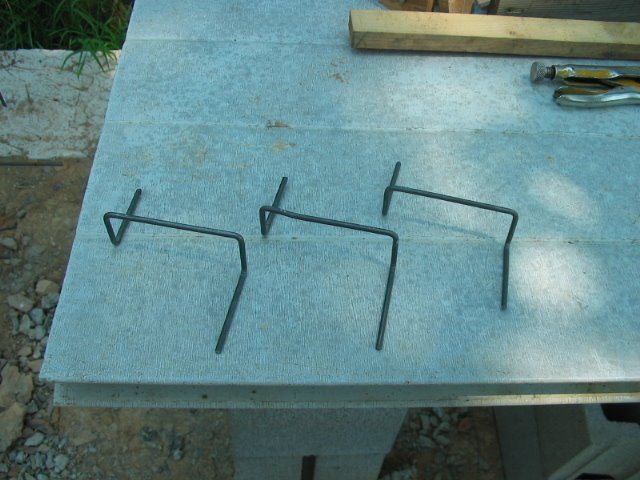
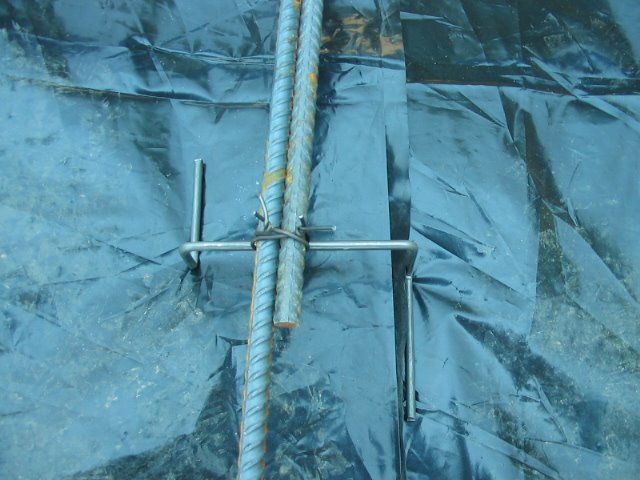
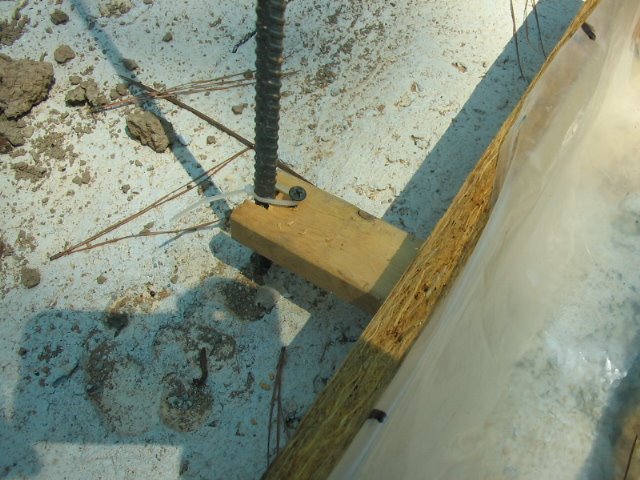
After getting all the rebar placed, tied and supported on rebar chairs I call up the concrete man and a day or two later here he comes. It was 95 degrees when he arrived. The pour went very smoothly compared to the second pour. We poured the remaining footers first with “thicker” concrete; then added a little water to the mix to pour the slab (this may have caused problems discussed later). The driver helped me screed off the slab with a 2x4, showed me how to use the bull float I'd rented and helped me float the edges with a magnesium hand trowel. It looked pretty good as we cleaned up all the tools and he washed out the truck. He drives away and 30 minutes later I start seeing spider web looking cracks showing up in the slab. First, one, then two, then three, finally five or six. Cracks vary in length from 1 foot to 3 foot and widths of 1-2 mm. All the cracks are in the middle of the slab, none of them are diagonal in direction.

I call the concrete company, it’s 4:30 pm and they've all gone home for the day. I try to look up the name of the manager in phone book, no luck; same for the company owner, and same for the concrete truck driver. I realize I'm on my own.

I hadn't planned to do anymore troweling, figuring I'd just screw it up, but hey, what have I got to lose now. So, out comes the water bucket and magnesium trowel... and hand floating begins. The cracks close up nicely as I rework the slab. I end up re-working probably 2/3 of the roughly 12x12 slab. To get out in the middle of the slab I lay down pieces of plywood to put my knees on. Only one hour since pour it’s already firmed up enough to support my weight (on plywood).

When I'm finally finished I putter around for 30 minutes or so to see if any more cracks are gonna show...none. So, I water it down good and cover it with visqueen and call it a day. Needless to say that night was a worrisome night; couldn't wait until morning so I could go check it, but at the same time afraid of what I’d find.

What a relief...no cracks overnight. I checked under the visqueen several times the second day, and still finding plenty of water there recovered it each time. I’ll leave it covered two or three days (the books recommend three days minimum, but seven is better). I checked it again at end of second day; still no cracks.

Still keeping my fingers crossed.

Basement Slab Rebar


Now comes the visqueen which goes in between the slab and the ground to prevent moisture from wicking up thru the slab. Then comes the rebar. I used #3 (3/8” diameter) rebar on roughly 12” centers to make a grid of rebar. One of the concrete books I read said when you connect rebar together it should overlap by 30 times the rebar diameter; that is (30 x 3/8” = almost 11 inches overlap).

Originally, I thought I’d be able to pour the whole slab at one time. That caused me to cut and bend my rebar pieces to economically fit the whole slab. Now, I find I’m pouring just half the slab. If I use the original rebar design I’ll have to install ALL the rebar now. That’s not so bad, until you try to finish the poured concrete and in so doing have to step in and out of the rebar holes (of the not yet poured side) as you use the bull float. I could just see myself tripping and falling all over the place, so I recut about 12 pieces of rebar. This way I only have to install rebar in the side I’m pouring and I have plenty of room to move around without falling down.

I made my rebar chairs out of 3/16” steel rod which I have a LOT of. The metal is soft, so it’s easy to cut with bolt cutters and it’s easy to bend/hammer into shape in a vise. I wanted my rebar to sit 1/3 of the slab thickness up off bottom, so that meant roughly 1-1/2” chair height. None of the stores had rebar chairs of this height, so I just built them myself. Why 1/3 of the slab thickness? In my college civil engineering classes (30 years ago) I took a course on reinforced concrete. We learned that the bottom half of any normal concrete slab is in tension and the top half is in compression. Concrete works great in compression, but lousy in tension, so you need rebar to handle the tension loads and the rebar needs to be located in the bottom part of the slab (not in the middle, a commonly held belief). Common sense would say put it in the middle of the tension side (exactly ¼ of the slab thickness off bottom), but then any irregularities of the concrete pour might end up uncovering some of the rebar, which would lead to rust and rebar deterioration. So, I went 1/3 of slab thickness as a safety factor.

Disclaimer: I have a couple of degrees in civil engineering, but I am NOT a licensed professional engineer, so take this explanation for it’s entertainment value only, and NOT as advice for how you should build your house. If you have questions for building YOUR house, please seek the guidance of a licensed engineer. My basement slab will have no heavy loads put on it; ie no cars, no heavy equipment, and the slab is built such that it does not support the weight of the house above it. As such I could maybe have gotten by without rebar. I personally don’t like wire mesh and I am not yet convinced of the benefits of using fiberglass in concrete.

Basement Slab Formup


I have to pour the basement slab in two separate pours. The concrete truck has a three yard capacity, and that isn’t enough for the whole slab AND the remaining basement footers I have to pour. So, the plan is to do the remaining footers and half the slab; which totals about 2.5 yards.

The slab will sit on top of the footers, it also sits “inside” the concrete block basement walls. Between the slab and the wall will be expansion material similar to that tarry looking stuff sometimes used in driveways. I could build the bottom layer of the block wall and use that as my form, but then it would be almost impossible to get the expansion material in afterwards.

So I built 4” tall wood forms for the pour. I used little wood spacer blocks to hold the form still and to prevent the form from bowing out with the weight of the concrete. I used a screw and zip tie to hold things still. This might be overkill, but when you pour concrete by yourself you really can’t afford anything to go wrong.

On the left side of the pic above is a basement footer and one of the vertical rebar for drystack wall construction. On the right will be the slab, poured inside the plastic sheet.